 darbylanefurniture.com Interior design ideas with the latest interior inspiration

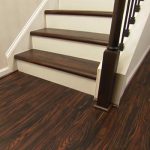
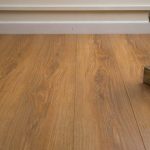
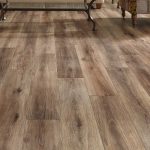
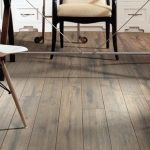
Laminate flooring is a popular and cost-effective flooring option for many homeowners. It can mimic the look of hardwood, tile, or stone, and is easy to install with some basic tools and skills. If you’re looking to install laminate flooring in your home, here are some tips on how to do it like a pro.
1. Gather your tools and materials Before you start installing laminate flooring, make sure you have all the necessary tools and materials on hand. You’ll need laminate flooring planks, underlayment, spacers, a saw (circular saw or jigsaw), hammer, tapping block, and a pull bar. Additionally, make sure you have a clean and level subfloor to work with.
2. Prepare the subfloor Before installing laminate flooring, it’s crucial to prepare the subfloor to ensure a smooth and level surface. Remove any existing flooring and make any necessary repairs to the subfloor. Clean the subfloor of any debris, dust, or dirt, and ensure it is completely dry before laying down the underlayment.
3. Install the underlayment Lay the underlayment over the subfloor, making sure to overlap the seams and secure it in place with tape. The underlayment will provide additional insulation and moisture protection for your laminate flooring.
4. Start laying the first row Begin by laying the first row of laminate flooring along one wall, leaving a small gap between the planks and the wall for expansion. Use spacers to maintain the gap and ensure a uniform look. Cut the planks as needed to fit at the end of the row using a saw.
5. Continue with subsequent rows Continue laying the laminate planks row by row, using the tapping block and hammer to securely lock each plank into place. Ensure the joints are tight and there are no gaps between the planks. Use the pull bar to help fit the last plank in each row.
6. Cut around obstacles When you come across obstacles like doorways or corners, measure and cut the laminate planks to fit around them. Use a jigsaw or a coping saw to make precise cuts, ensuring a seamless look.
7. Finish with trim Once all the laminate flooring is installed, finish the edges with trim pieces to cover the expansion gap and provide a finished look. Secure the trim pieces in place with nails or adhesive.
8. Clean up Finally, clean up any debris or dust left behind from the installation process. Sweep or vacuum the floor to remove any leftover dirt and enjoy your newly installed laminate flooring.
By following these steps and paying attention to detail, you can install laminate flooring in your home like a pro. With the right tools and techniques, you can achieve a beautiful and durable flooring option that will enhance the look of your space.